MP Skin Studio Tutorial
It's been several years since I originally released MP Skin Studio (MPSS) for the GBAMPv2, so revisiting it is interesting. Any kind of original documentation that resided on Lik-sang where I oriinally released MPSS is now gone (thanks, Sony) so, I'm here to provide a real tutorial as there seems to be interest for the old skinner that I didn't realize still existed. So, here is the official MP Skin Studio tutorial, brought to you by dxprog. I'll go through the entire process making a real skin as I go.
What you'll need: MP Skin Studio [ download ] The GIMP [ download ] (or any other imaging software that can create 256 color bitmaps). This tutorial will be written with GIMP in mind VisualBasic runtimes [ download ] - Only needed if you get some DLL missing errors when running MP Skin Studio.
Step 1 - Creating Your Images
The first thing you'll need to do before even opening MPSS is to create all the images for your skin. Here's a list of everything there is to create:
Backgrounds - 240x160 There are four different backgrounds:
- main
- file
- e-book
- music All background are 256 color images. More on this in a bit.
Main icons - 64x64 There are six different icons that go on the main screen. They are:
- movie
- music
- picture
- game
- e-book
- help/setup These icons share the same 256 color palette as the background images. Again, more later.
File icons - 16x16 There are two small icons used for the file screen, one for directories and one for going back a level. These share the same 256 color palette as the file background.
So, after you've gathered up all your images (assuming you're not creating them from scratch, which I won't be), we'll need to take them into GIMP for cropping and color reduction, which I will now explain :)
256 colors? Palettized? What now? For anybody who's never messed around with palettized file formats, this part will be the most annoying. Without going into too much technical detail, the GBA can only display so many colors at a given time to save on space and speed up render times. This means take our images, which could have a possible 38,400 colors and reduce them down to 256. This is where the GIMP comes in.
Making a Simple Background
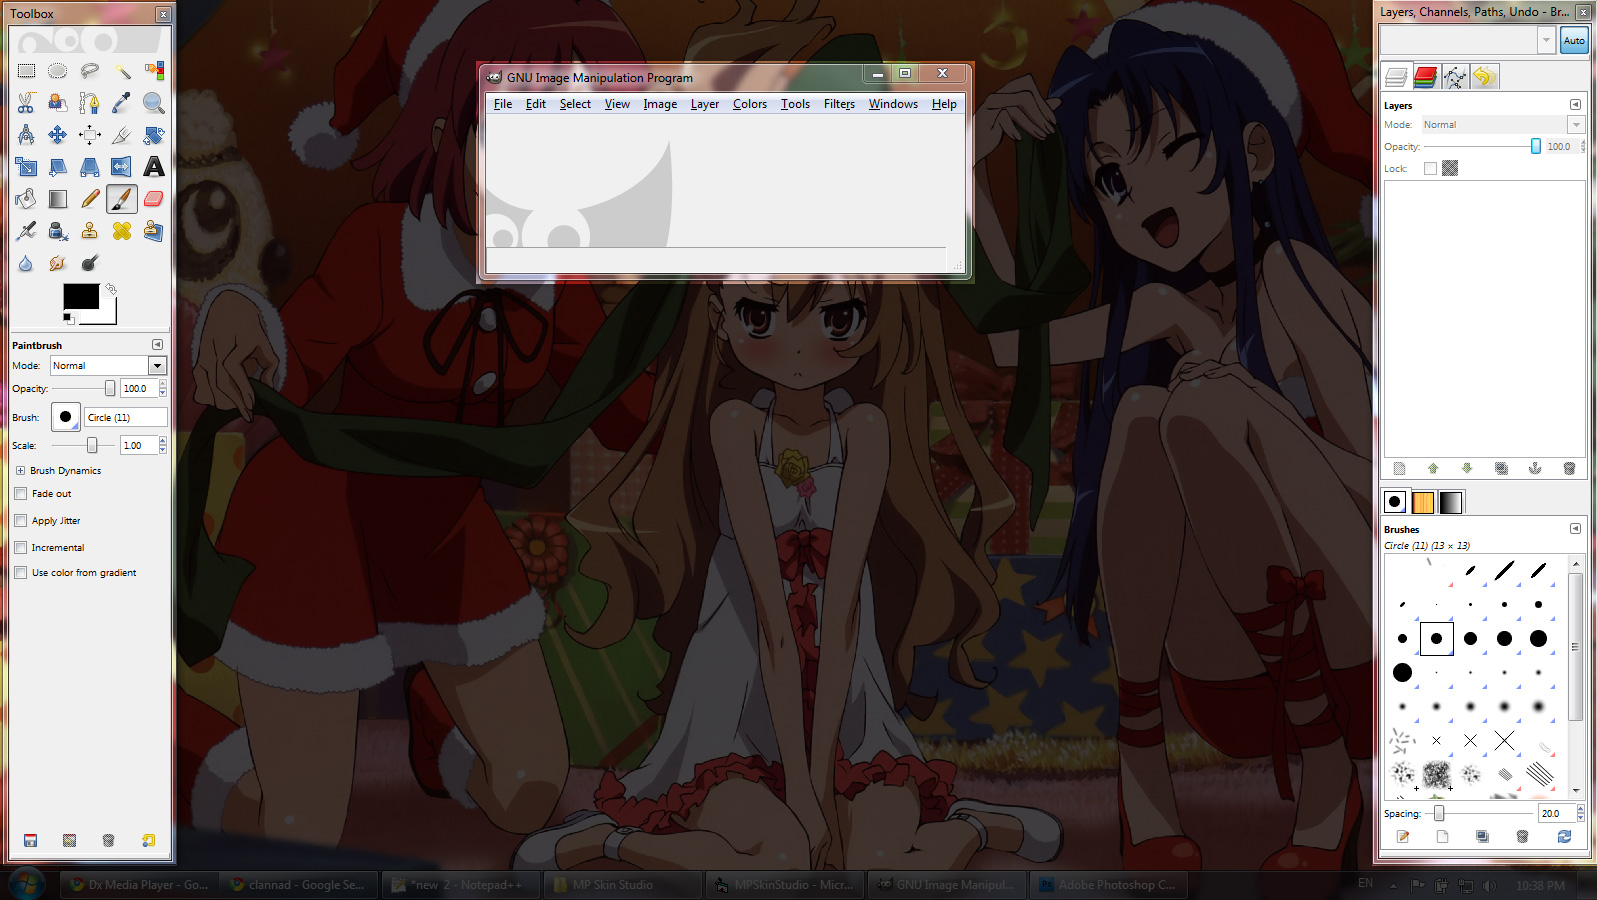
We need to take a different approach for creating backgrounds that have icons and those that don't, though if you're feeling lazy you can use this method for all of them and MPSS will do it's best to make things look all pretty. Enough preamble, let's fire up GIMP. It'll take a while to start up the first time, but with some patience you should see something like this once it's done:
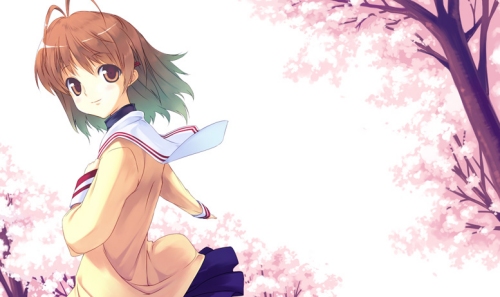
First you'll need to crop up your background image, so click File->Open, navigate to where you've saved the image you want and click open. It should now display in the main GIMP window. This is the image I will be using for this tutorial:
Now that you've got your image ready, it's time to crop. In the tool window, click the drop tool (or press Shift+C). You'll want to check "Fixed Aspect Ration" and make sure it's set to 240x160:

Select the area you want to crop your background to and press enter. Now we need to resize the image to 240x160. To do that, click Image->Scale Image using 240x160 as your size:
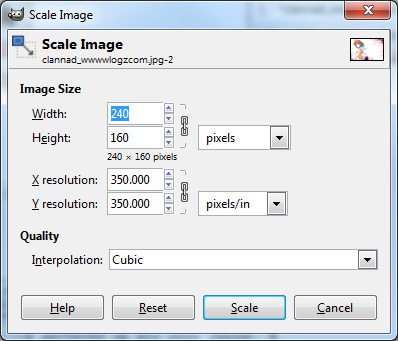
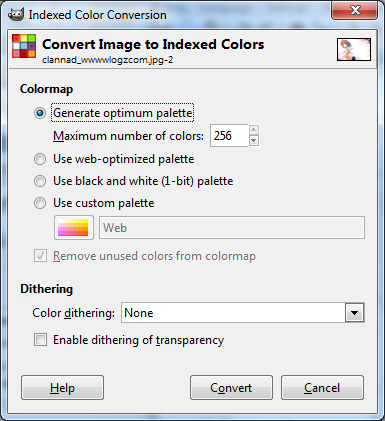
Now we're ready to convert this to 256 colors. Click Image->Mode->Indexed. Make sure "Generate optimum palette" is checked and set to 256 colors. You can mess around with dithering if you like to test different results, but I usually leave it off (personal preference). Here's what the settings window should look like:
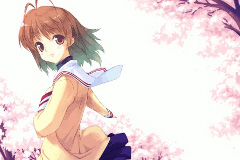
Our image is now ready for importing into MPSS! Here is what the final product looks like:
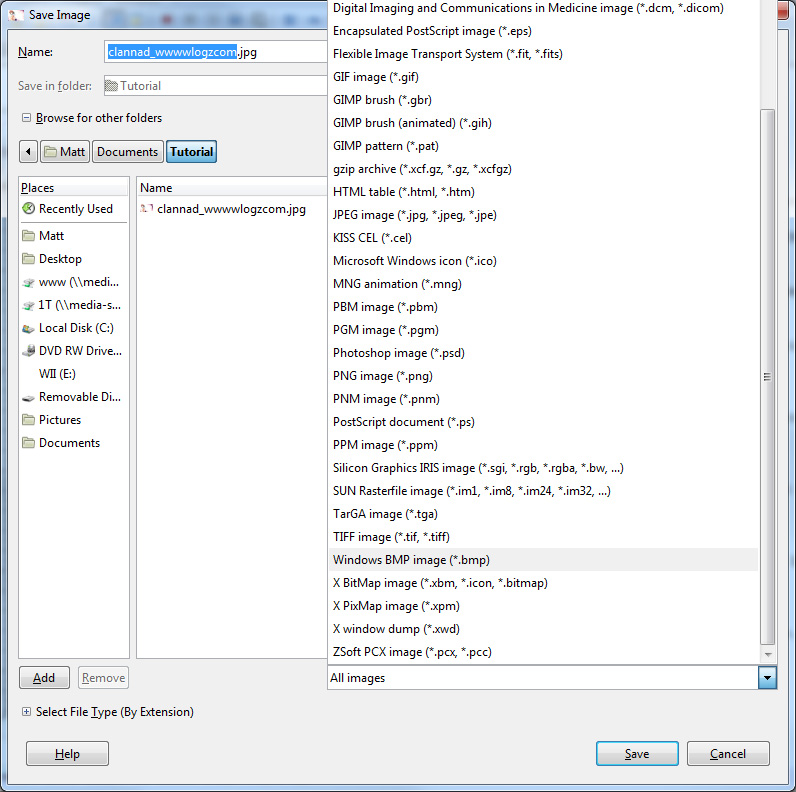
Before we can take the next step, however, we must save this. So click File->Save As. You'll want to save this as a BMP file, so select Windows BMP Bitmap from the format drop down:
Name your file appropriately (with a .bmp extension) and click save. You'll be nagged with a window asking if you want to save with run-length encoding. Leave this unchecked and press OK.
As I mentioned earlier, you can create all your backgrounds this way, but to get the icons looking all nice we'll need to go a step further. First, let's create some icons.
Creating an Icon
The steps to create an icon are very similar. In fact, it's just changing a couple of values. So, here they are:
Cropping: set your ratio to 1:1 instead of 240:160 Scaling: Depending on which icon, you'll use 64x64 or 16x16 when scaling your image (see above reference for which icons use what size). Transparency: If you would like an icon to have a transparent part, you'll need to select a color will be the transparent color and paint any areas you want transparent with that color (I use the pencil tool with a 1 pixel brush). I usually use an unsightly green, like so:

Done!
Making a Background w/ Icons
Here is where things can get a little tedius. This step needs to be performed BEFORE you set your image to 256 colors. With your background and icons all open, start copying all of your icons to your background image on new layers. Here's how we do that. On your icon, select the entire canvas by press Ctl+A and the press Ctl+C to copy. Now, move over to your background image and press Ctl+V. Your icon should appear in the middle of the screen. We want this on a new layer, so now click the New Layer button in the layers window:

Note - It doesn't matter where your icons are placed, just as long as they're there.
Once you've gotten all your icons pasted over, reduce the colors as before. Your icons and background are now using the same palette and will look all pretty for your skin. Now we need to save out all of our images. First, start with the background. Hide all of the icon layers by click the little eyeball icon next to it in the layers window:

Once you've hidden these, save the background image as above. Now to do all the icons. Turn all your icons back on in the layers window reversing what we did before. Now, right click on the layer with your icon and click "Alpha to Selection." Click Ctl+C to copy the icon to the clipboard. Now click File->Create->From Clipboard. Your icon should show up. Sadly, the palette information isn't carried over in the copy, so you'll need to switch the mode to indexed again. Now save your icon as a BMP as before.
After all your icons and backgrounds have been sized, palettized and saved, we're ready to put it all together in MPSS!
Pulling it all together
Now that all the graphics have been prepared, we're ready to pull it all together in MP Skin Studio. So, open it up and you'll be greeted with the following screen:
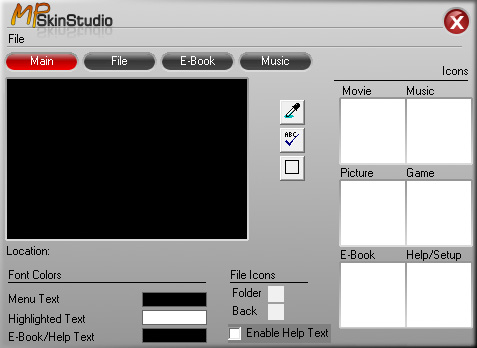
The Main Screen Since the main screen covers most all areas of MPSS' functionality, we'll start there and fill in where needed. First thing we'll do is load up our background. To do this, click the large black square in the center of the window and you will be prompted to select your background image. Pick the image you made for the main screen and it will display in the black area we just clicked:
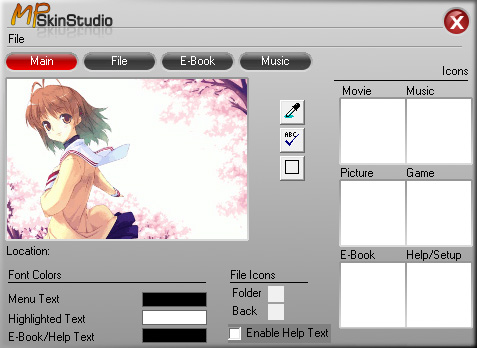
Done! Now we'll load up all our icons. These are all lined up on the right side of the screen under the "Icons" text (surprised?). These aren't set right now, so they appear as white squares. Above each square is the name of each icon (movie, music, etc). To load an icon image, right-click the icon you want to load and select your bitmap from the resulting dialog box:
![]()
Now, as can be noted by the tell-tale ugly green color, this icon was intended to have transparency, so we need to tell MPSS that this color is supposed to be transparent. To do this, select the color dropper tool:
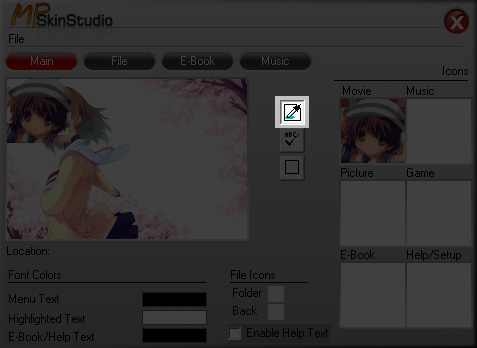
Now, right-click the color you wish to be transparent on your icon. This color will now be replaced with a color checker background indicating transparency:
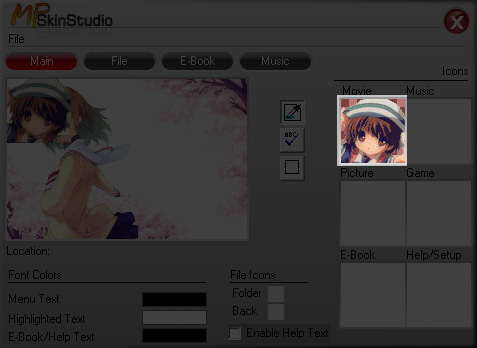
Rinse and repeat this step for all of your icons. Note that you do not need to set an image for any icon if you wish. That said, I'm going to use only the one icon for this demonstration. Now that we've loaded all of our icons, it's time to place them on the screen. To do this, click and drag an icon to the position you'd like it be on the background:
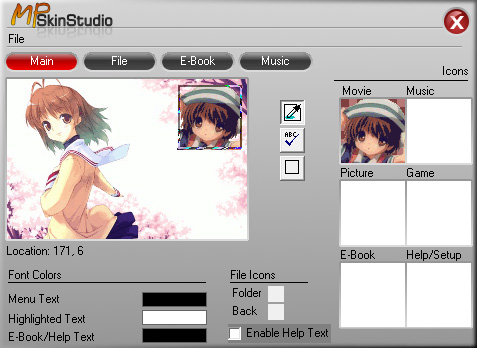
The "location" label underneath the background image will update with the current X and Y coordinate to allow you more precision. Again, rinse and repeat this process for all icons. Any icon you do not place will default to position 0, 0. There a couple things to note before we move on:
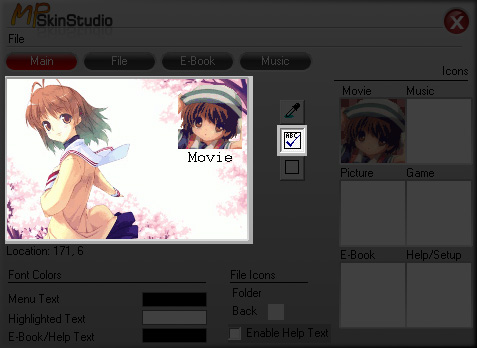
- Icon text: this allows your skin to display (or not) the captions that appear underneath the icons:
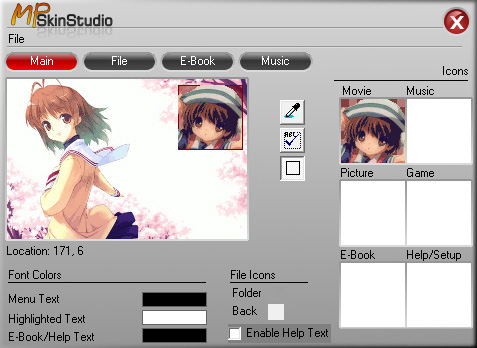
- Bounding box: this is an editor feature. Enable this will draw a box around all of the icons to help in positioning them:
Now that we've finished the icons, it's time to set font colors. You'll find this area in the bottom left of the window. There are three different font colors to set. They are:
- Menu text: this is the text that appears on the main and file screens.
- Highlighted text: Highlighted versions of the above text items.
- E-book/help text: Text that appears for e-books and in the help section.
To set the font color, simply click the color block to the right of the item you want to change. Select your color from the color picker dialog and click OK. Done!
Odds and Ends All the other screens utilize what we've just done for the main screen, but I'll run through them real quick. To switch to a different screen, click on one of the gray pills at the top that read "Main", "File", "E-Book" and "Music". You'll notice that as you click through these, the background image will change. To set the background image for a screen, just click on the large box as we did above. Even though they're still displayed, there are no large icons associated with these other screens with the exception of the file icons.
After you've set the "File" background image, you can load in your file icons. To do this, right click on the white box to the right of "Folder" or "Back" underneath "File Icons" and load in your icon. Setting icon transparency works the same as it does for large icons, using the dropper tool and right-clicking the color you wish to be transparent.
Saving Up Once you've gotten all your graphics loaded, positioned and such we're ready to save our skin. Click File->Save BACKIMG. Be sure to name your file BACKIMG.ext where ext can be whatever you want. If you've chosen to leave out some backgrounds or icons you may receive a warning. Just click OK and it'll save anyways. You're now ready to put your skin onto your GBAMP or M3!
Errata
During the writing of this tutorial I've encountered more than a few bugs. As I originally wrote this software six years ago, I can't offer much in the way of support in terms of fixing them (I'm missing at least one source file :(). However, I will list what I discovered:
- Having the bounding box enabled prevents you from loading in a new background. Just disable it and all is good.
- Changing an icon's transparent color more than once will result in errouneous display.
- If you open/create a skin that has all icons and then try to save a skin that is missing some icons, the missing icons will be replaced with the ones from the previous skin. You can clear this by deleting all the files in PROGRAM_FOLDER\temp where PROGRAM_FOLDER is where you've extracted MPSS.
If you find any other issues, please e-mail me at matt@dxprog.com. If there's enough demand, I might find my way to rewriting this piece of software, but no promises.
Happy skinning!
